 Save
Save These crackling, butter-thin chips caught me off guard at a dinner party last year when my friend casually pulled a batch from the oven—I watched the salami curl into golden waves and the cheese bubble into lace-like crisps, and I immediately thought: this is genius. No flour, no guilt, just the pure essence of what makes charcuterie boards so addictive, concentrated into something you can eat with your hands while standing by the kitchen counter. Once I figured out the timing, they became my secret weapon for impressing people without actually cooking.
I made these for my book club a few months back, and the room went quiet for exactly ten seconds—that magic moment when people taste something unexpected and their brains catch up to their mouths. Someone asked if I'd bought them from a fancy shop, and I got to reveal the most satisfying secret: they're just meat and cheese, baked. The relief on everyone's faces was priceless, like they'd been given permission to stop overthinking snacks.
Ingredients
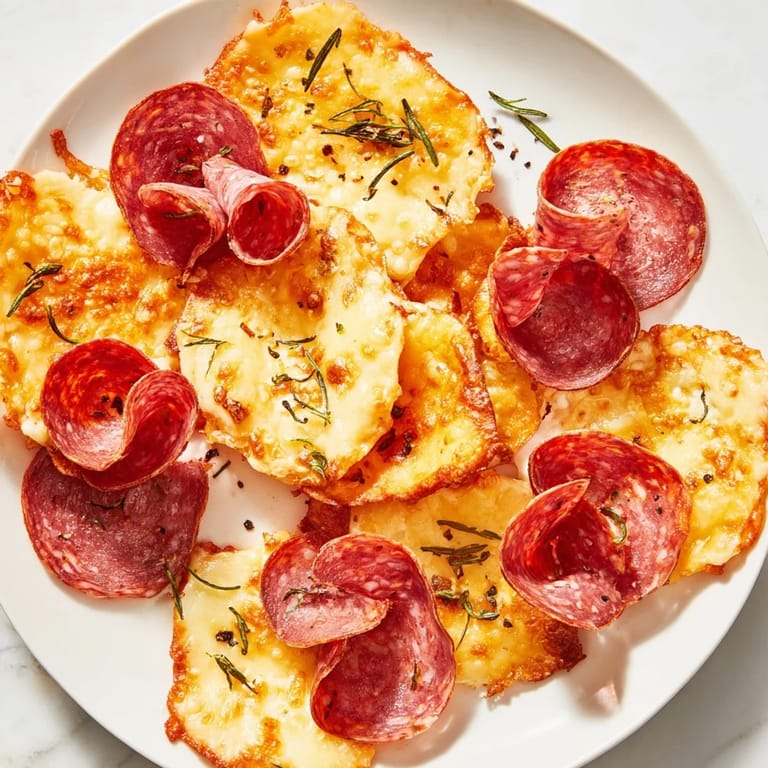
- Thinly sliced salami (100g): The peppery backbone here—slice it yourself if you can, or ask the deli counter to go as thin as possible, because thickness is the difference between crispy chips and chewy disappointment.
- Thinly sliced prosciutto (100g): This delicate one crisps up like a savory tuile and adds elegance without heaviness.
- Thinly sliced pepperoni (100g): The flavor anchor that keeps these from tasting one-note, bringing heat and a subtle spice.
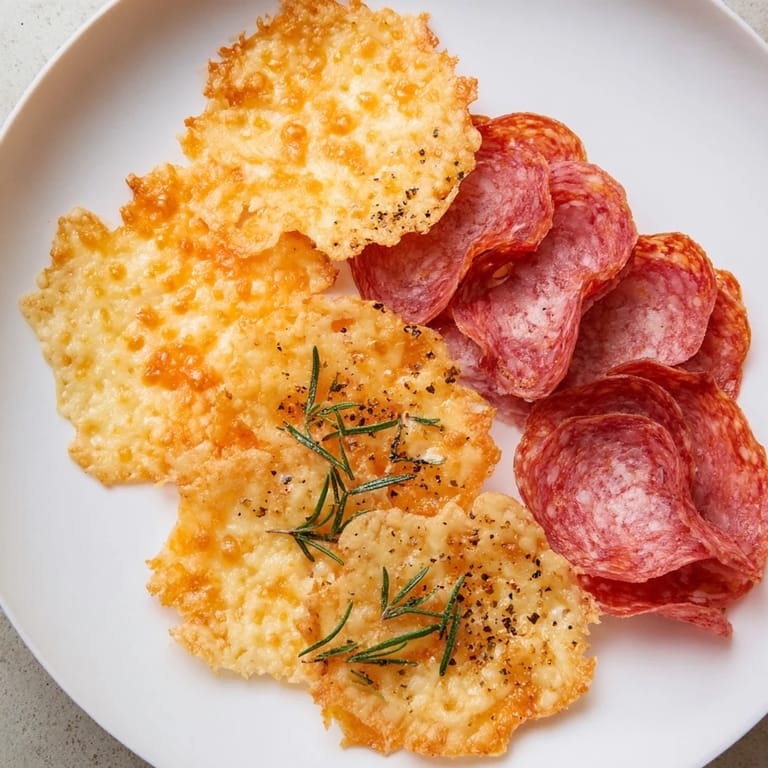
- Hard cheese like aged cheddar, Manchego, or Parmesan (100g): These varieties have lower water content, which means they'll crisp instead of turning into melted puddles.
- Semi-hard cheese like Gouda or provolone (100g): These add richness and a slightly buttery character as they bake.
- Fresh herbs like thyme or rosemary, finely chopped (optional): A whisper of green makes these feel intentional, not lazy.
- Cracked black pepper (optional): A finishing touch that wakes up everything else on the plate.
Tired of Takeout? 🥡
Get 10 meals you can make faster than delivery arrives. Seriously.
One email. No spam. Unsubscribe anytime.
Instructions
- Set your stage:
- Preheat the oven to 375°F (190°C) and line two baking sheets with parchment paper—this detail matters more than you'd think, because it's the difference between chips that slide off easily and chips that stick and tear. I learned this the hard way.
- Arrange the meat carefully:
- Lay your salami, prosciutto, and pepperoni on one baking sheet in a single layer, making sure the slices don't overlap or touch—they need room to breathe and crisp up evenly. Think of it like giving each slice its own little sunbathing spot.
- Arrange the cheese with intention:
- Place cheese slices on the second sheet with space between them so they can bubble and brown without fusing together. Semi-hard and hard cheeses have different melting points, so you're really setting them up for success here.
- Optional seasoning moment:
- If you're feeling it, sprinkle fresh herbs or cracked pepper over the cheese—this is where you add personality to the batch.
- Bake the meat first:
- The meat needs 8–10 minutes until the edges turn crisp and slightly browned, which sounds quick but watch it around minute 8 because ovens have moods. The chips will continue crisping as they cool, so don't wait for them to feel completely brittle in the oven.
- Then bake the cheese:
- Pop the cheese in for 6–8 minutes—you're aiming for golden and bubbling, like little molten promises. Let them cool for 5 minutes on the sheet before gently lifting them off with a metal spatula, because they're delicate when warm.
- The final reveal:
- Arrange everything on a platter and serve immediately while the chips still have that perfect contrast between crispy edges and just-set centers.
 Save
Save These chips somehow turned into my thing to bring to potlucks, and I realized it's because they're a conversation piece that doesn't require apology or explanation—they just sit there looking elegant and tasting like something someone else made in a professional kitchen. That's the quiet power of this recipe.
Storage and Keeping
The best part is they actually taste fine at room temperature, which means you can make them ahead and let them sit in an airtight container for up to two days without guilt. I've kept them in the fridge too and they still crisp back up when you eat them, though they lose a tiny bit of that just-baked charm.
Flavor Variations and Pairing
Once you understand how this works, the possibilities expand naturally—smoked meats add a deeper dimension, and a pinch of smoked paprika on the cheese before baking transforms it into something almost sophisticated. The real magic happens when you surround them with olives, pickles, and a light red wine, which somehow makes a simple baked meat and cheese situation feel like an actual entertaining moment.
Why This Works as Your Snack Strategy
These chips fill that gap between wanting something substantial and wanting something you don't have to think about—they're naturally low carb, naturally gluten free, and naturally delicious in a way that doesn't require explanation or apology. You're not eating "diet chips," you're eating the best version of something people actually want to eat.
- Make these when you need to impress people without looking like you tried too hard, because the simplicity is the whole point.
- Keep smoked paprika, quality cured meats, and hard cheeses in your rotation, and you're always three minutes away from looking like you've got this figured out.
- Serve them warm if you can, but don't stress if they cool down—they're honestly better warm, which means there's always a reason to make them fresh.
 Save
Save There's something deeply satisfying about serving food that's both elegant and effortless, and these chips somehow manage both. Once you make them once, they become your go-to answer to the question "what are you bringing?"
Recipe FAQs
- → What types of meats work best for charcuterie chips?
Thinly sliced cured meats like salami, prosciutto, and pepperoni crisp well when baked and offer rich, savory flavors.
- → Which cheeses are suitable for baking into chips?
Hard cheeses such as aged cheddar, Manchego, or Parmesan, and semi-hard cheeses like Gouda or provolone melt and crisp beautifully.
- → How can I prevent the chips from sticking to the baking sheet?
Line baking sheets with parchment paper to ensure easy removal and avoid sticking during baking.
- → Can herbs be added before baking?
Yes, sprinkling fresh herbs like thyme or rosemary, or cracked black pepper on cheese slices adds extra aroma and flavor.
- → What is the best way to store leftover chips?
Keep leftovers in an airtight container at room temperature for up to two days to maintain crispness.