 Save
Save My neighbor brought over a plate of these one afternoon, and I couldn't stop eating them straight from her freezer. There's something almost magical about the snap of cold chocolate giving way to creamy peanut butter on crispy rice, the kind of snack that doesn't feel like you're being good but somehow is. I asked for the recipe thinking it would be complicated, and that's when she laughed—ten minutes of actual work, she said, the rest is just letting time do the job. Now I make a batch whenever I need something that tastes indulgent but won't keep me in the kitchen.
I brought these to a potluck once, nervous they were too simple, and watched them disappear faster than the elaborate desserts people had spent hours on. One person asked if I'd made the rice cakes from scratch, which made me laugh so hard I nearly dropped the empty plate. That moment taught me something: people don't actually want complicated; they want delicious, and they want to eat it while it's cold.
Ingredients
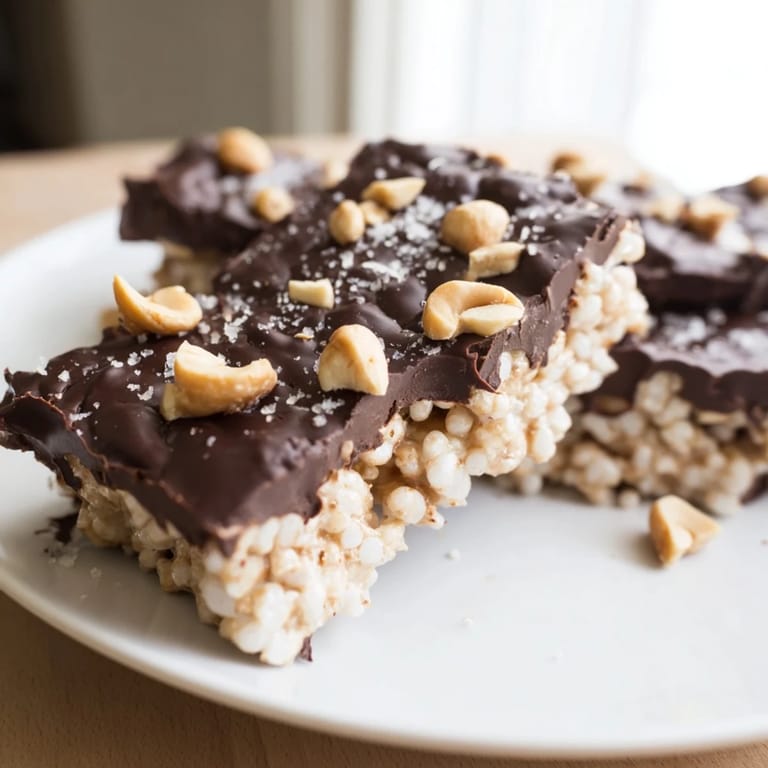
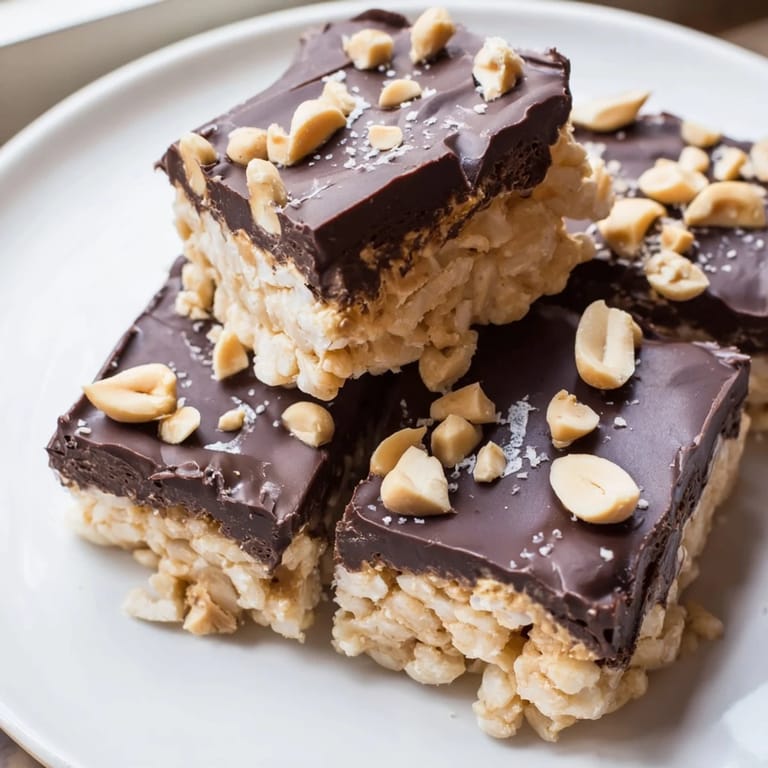
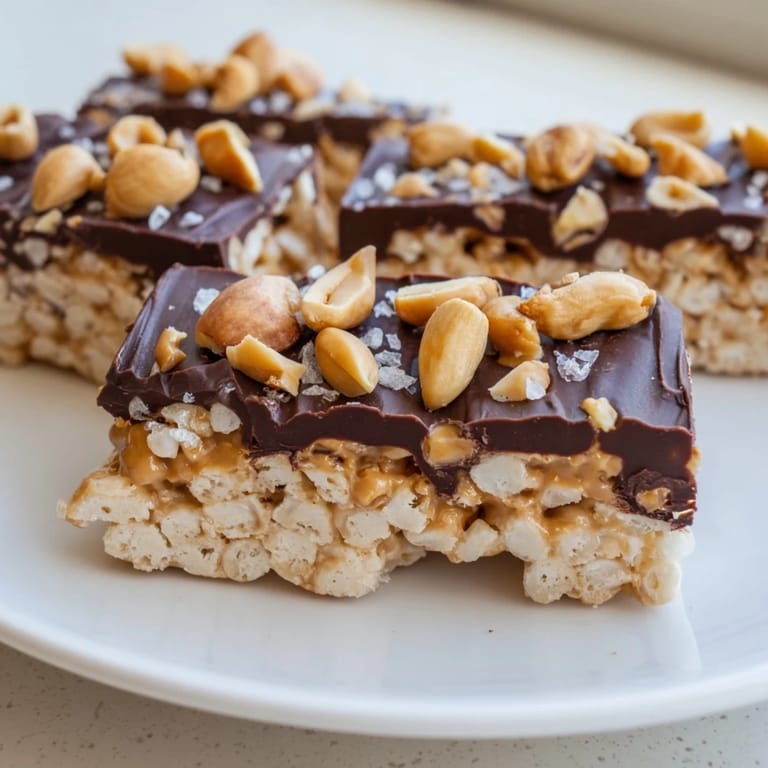
- Rice Cakes: Three large plain ones are your canvas, sturdy enough to hold the toppings but light enough that they stay crispy even under the chocolate.
- Creamy Peanut Butter: Six tablespoons is the sweet spot; too little and your bites taste mostly of chocolate, too much and it gets heavy. I prefer unsweetened because the chocolate already brings sweetness.
- Semi-Sweet or Dark Chocolate: One hundred grams chopped fine melts faster and coats more evenly than chunks would.
- Coconut Oil: This tablespoon is optional but honestly worth it; it makes the chocolate thinner so it flows like silk instead of clinging in lumps.
- Roasted Peanuts and Sea Salt: Just a sprinkle, but together they make people's eyes close and nod slowly when they bite in.
Tired of Takeout? 🥡
Get 10 meals you can make faster than delivery arrives. Seriously.
One email. No spam. Unsubscribe anytime.
Instructions
- Set Your Stage:
- Line a baking sheet with parchment paper first, because chocolate on bare metal is a cleanup nightmare. Break your rice cakes into large, uneven chunks—they don't need to be perfect squares, and honestly, the irregular pieces feel more homemade.
- Spread Your Peanut Butter:
- Give each piece a generous tablespoon of peanut butter, spreading it thin enough that you can still see the rice cake texture underneath. This is where you start to see what the final thing will taste like.
- Melt Your Chocolate:
- Microwave the chocolate and coconut oil together in short 20-second bursts, stirring between each one so nothing burns. You'll know it's ready when it looks like thick cream and a spoon drawn through it leaves a clean trail.
- Coat with Chocolate:
- Spoon or drizzle the melted chocolate over each peanut butter-covered piece, using the back of the spoon to spread it gently. Don't be precious about it; the imperfect drips are what make it look homemade.
- Add Your Toppings:
- Scatter chopped peanuts and a pinch of sea salt over the chocolate before it sets, so everything sticks rather than sliding off later.
- Freeze Until Set:
- At least 45 minutes in the freezer, though overnight is even better if you have the patience. The chocolate will go from soft and touchable to snappy and satisfying.
 Save
Save My daughter calls these "fancy finger foods," which is the highest compliment I can get from a seven-year-old. There's something about a snack that feels special enough to offer to guests but easy enough that you can make it on a Tuesday without thinking.
Why This Works
Rice cakes are already crispy, so you're not waiting for anything to bake or trying to create texture from scratch. The peanut butter acts as a glue and a flavor bridge, and the chocolate seals it all together while turning the whole thing cold and snappable. It's three layers of contrast that somehow make sense together, like good design by accident.
Flavor Variations Worth Trying
Once you've made these the traditional way, you realize the formula is flexible. I've tried almond butter instead of peanut butter and it felt more delicate, less lunch-box and more afternoon-tea. Cashew butter is creamier and almost buttery; it changes the whole feeling of the snack. A drizzle of honey on the peanut butter layer before the chocolate makes them sweeter and stickier, which some people love and some don't.
Storage and Serving
Store these in an airtight container in the freezer and they'll keep for weeks, though they rarely last that long in our house. They go from frozen and snappy to soft and a little melty in about five minutes at room temperature, so pull them out just before you want to eat them.
- If you're making these for a crowd, keep them frozen in a cooler so they stay set during transport.
- They thaw too fast on a counter, so don't make that mistake; a freezer is their happy place.
- Double the recipe if you think you'll want them around—you will, and you'll be sorry you didn't.
 Save
Save These are the kind of snack that reminds you that the best things to eat don't have to be complicated or time-consuming. They're just three things that taste good together, held still by a freezer until you're ready to enjoy them.
Recipe FAQs
- → Can I use different nut butters?
Yes, almond or cashew butter work well as alternatives to peanut butter, adding unique flavors and creamy texture.
- → What type of chocolate is best for melting?
Semi-sweet or dark chocolate melts smoothly and balances the peanut butter’s richness. Adding coconut oil helps achieve a silky texture.
- → How long should the bars be frozen?
Freeze them for at least 45 minutes or until the chocolate topping sets firmly for easy cutting and serving.
- → Are rice cakes gluten-free?
Certified gluten-free rice cakes ensure the snack is safe for gluten-sensitive diets; always check packaging labels.
- → Can I add toppings to enhance flavor?
Sprinkling chopped roasted peanuts and a pinch of sea salt adds crunch and a savory note that complements the sweet layers.