 Save
Save I stumbled onto this recipe during a particularly chaotic Tuesday morning when I was standing in front of the fridge at 6 AM, desperately needing breakfast but too tired to actually cook anything. My eyes landed on a jar of peanut butter, and suddenly I remembered those peanut butter cups I'd loved as a kid—the way the chocolate and peanut butter would melt together. Why not capture that magic in oatmeal form? Eight hours later, I had something that tasted like dessert but made me feel virtuous eating it before noon. Now this jar sits in my fridge most weeks, waiting for those mornings when I need comfort food disguised as nutrition.
I made these for my roommate once without telling her what they were, just handed her a jar and said "trust me." Watching her face when she realized it was basically a healthy peanut butter cup for breakfast was worth the effort alone. She started making her own after that, and now we compete over jar space in the fridge like it's some kind of overnight oats turf war.
Ingredients
- Old-fashioned rolled oats (1 cup): They soften beautifully overnight without turning to mush, holding their texture in a way that quick oats never will.
- Milk, dairy or plant-based (1 cup): This is your liquid foundation—use something you actually like drinking because you'll taste it throughout.
- Plain Greek yogurt (1/2 cup): The secret weapon for creaminess and protein; don't skip it or substitute with regular yogurt or the texture suffers.
- Chia seeds (2 tbsp): They absorb liquid and add a subtle nuttiness that deepens as everything sits overnight.
- Maple syrup or honey (2 tbsp): Choose whichever you have on hand—they behave identically here and both create that silky sweetness.
- Vanilla extract (1/2 tsp): A small amount does enormous work, rounding out the chocolate and peanut butter notes.
- Salt (pinch): This tiny amount makes everything taste more like itself, especially important with cocoa powder.
- Creamy peanut butter (3 tbsp): The good stuff matters here because it's tasting straight up—I learned this the hard way with a jar of industrial peanut spread.
- Unsweetened cocoa powder (2 tbsp): Unsweetened is non-negotiable; sweetened versions throw off the balance with the maple syrup layer.
- Mini chocolate chips, crushed peanuts, sliced bananas (optional): These are your texture and flavor final words in the morning, so choose what makes you happiest.
Tired of Takeout? 🥡
Get 10 meals you can make faster than delivery arrives. Seriously.
One email. No spam. Unsubscribe anytime.
Instructions
- Combine the oat base:
- In a medium bowl, whisk together oats, milk, Greek yogurt, chia seeds, maple syrup, vanilla, and salt until everything is evenly coated and there are no dry pockets of oats hiding at the bottom. This takes about a minute of actual stirring, and doing it thoroughly now means better texture later.
- Divide into jars:
- Split the oat mixture between two jars or containers, pressing gently so it settles in an even layer. You want roughly equal amounts because the layers that follow need to be balanced.
- Create the peanut butter layer:
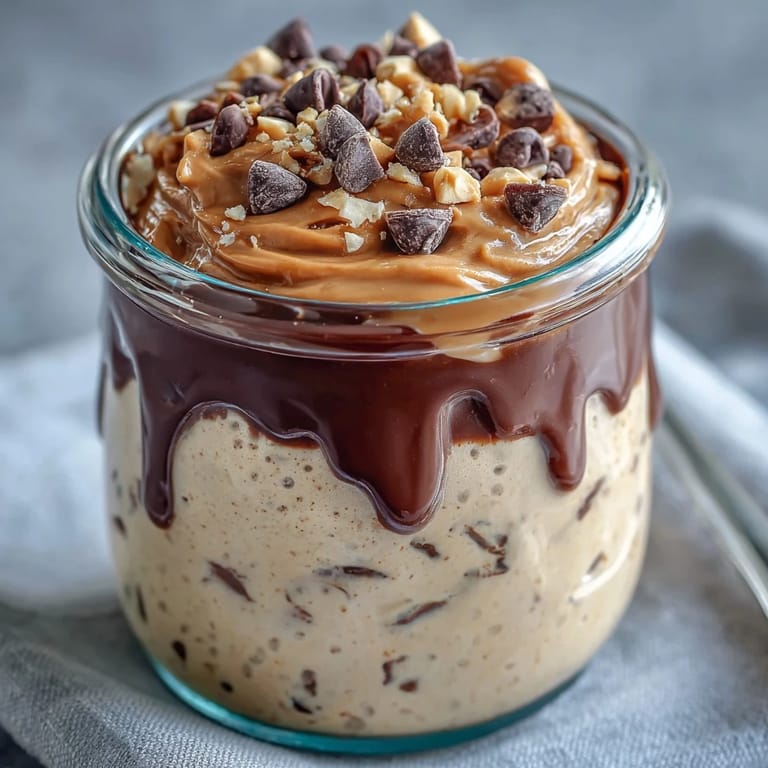
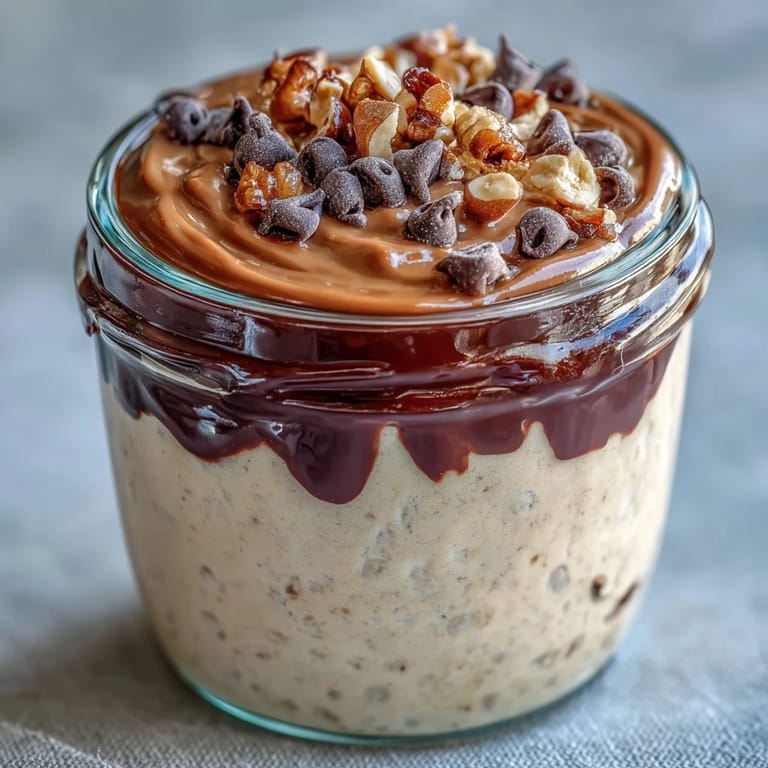
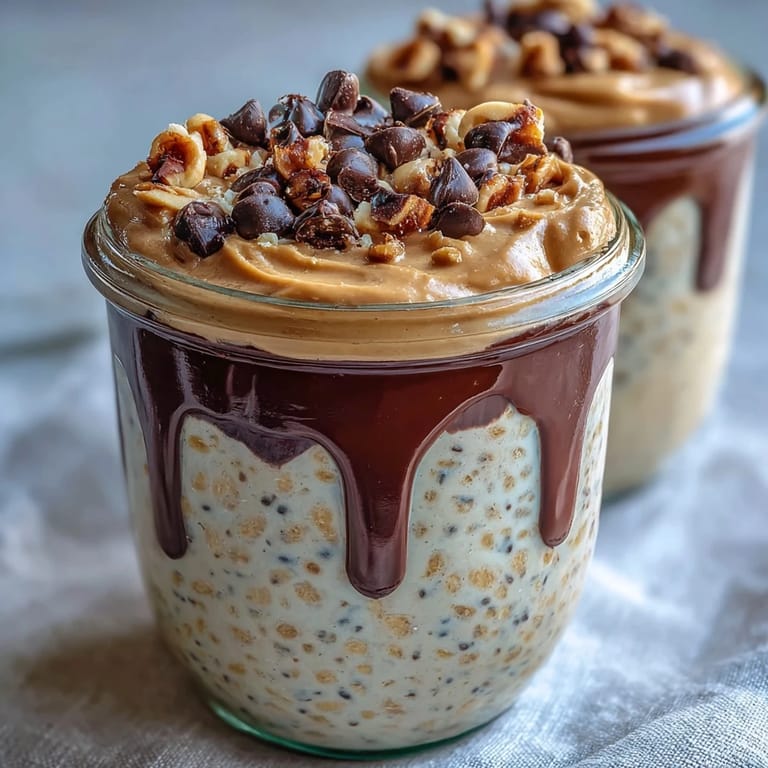
- In a small bowl, stir the peanut butter with 2 tbsp milk until it loosens into a pourable consistency—it should look like thick pancake batter, not a stiff blob. Drizzle or spoon half this mixture over each jar, letting it settle in swirls rather than one solid layer.
- Make the chocolate sauce:
- Whisk cocoa powder, maple syrup, and 2 tbsp milk together in another small bowl until completely smooth with no cocoa lumps remaining. Pour or spoon half over each jar, right over the peanut butter layer, and watch it create these gorgeous dark ribbons.
- Chill overnight:
- Cover your jars with lids and slide them into the refrigerator for at least 8 hours, though honestly overnight is perfect timing. The oats will absorb liquid, the flavors will meld, and everything becomes this creamy, spoonable dream.
- Top and serve:
- In the morning, give it a stir if you like mixed layers or leave it striped and add your toppings right before eating. Either way, eat it straight from the jar while you stand at the counter scrolling your phone like a normal person.
 Save
Save There's something oddly satisfying about opening the fridge and seeing these little jars lined up like edible art projects, knowing breakfast is completely handled. It stopped being just food when my mom asked for the recipe because she wanted something quick that didn't feel like a compromise. Now she texts me photos of her flavor variations, and somehow this silly overnight oats jar became our thing.
Flavor Customization Without Losing the Magic
The beauty of this recipe is how forgiving it is when you want to play around. Almond butter, tahini, or sunflower seed butter swap in seamlessly for peanut butter, each bringing their own subtle personality. I once used cashew butter because that's what was in my cabinet, and while different, it was honestly delicious in a quieter, creamier way. The cocoa powder quantity is also flexible—add an extra tablespoon if you want it darker and more intensely chocolate, or reduce it slightly if you prefer the peanut flavor to be more dominant.
Making It Work for Different Diets
This recipe slides into vegan, dairy-free, and gluten-free categories with minimal fussing, which is genuinely rare for a dessert-style breakfast. Use whatever milk and yogurt alternatives you trust—I've made these with oat milk, almond milk, and coconut yogurt with no complaints. The maple syrup keeps everything plant-based from the start, and certified gluten-free oats cost only slightly more than regular ones if you need that assurance.
Preparation and Storage Reality
The actual hands-on time here is maybe ten minutes, which means you can assemble these jars while something else is happening in your kitchen. They stay good in the fridge for about four days, though I rarely let them last that long because once you have them on hand, they get eaten. Here's what actually matters: let them sit the full 8 hours the first time you make them, give them a gentle stir before eating, and if they seem too thick in the morning, thin them with a splash of milk.
- Make them on a specific day each week so they become an actual habit rather than a random nice idea.
- Store toppings separately and add them right before eating so they stay crispy instead of getting soggy overnight.
- Use jars with tight-fitting lids or the fridge will smell perpetually like peanut butter, which honestly isn't the worst problem.
 Save
Save These jars have become my answer to so many mornings, and they've quietly turned into something I recommend to everyone because they actually work. There's a particular kind of joy in eating something that tastes like you're treating yourself while simultaneously fueling your day right.
Recipe FAQs
- → Can I use plant-based milk instead of dairy?
Yes, plant-based milk like almond, soy, or oat milk works well, maintaining creaminess and flavor.
- → How do I achieve a smooth peanut butter layer?
Mix creamy peanut butter with a small amount of milk until pourable for easy layering over the oats.
- → What toppings go best with this dish?
Mini chocolate chips, crushed roasted peanuts, or sliced bananas add texture and complementary flavors.
- → Can I prepare the layers in advance?
Yes, prepare and assemble layers the night before; chilling overnight helps flavors combine beautifully.
- → Is this suitable for a vegan diet?
Use plant-based milk and yogurt, and maple syrup instead of honey to adapt for vegan needs.