 Save
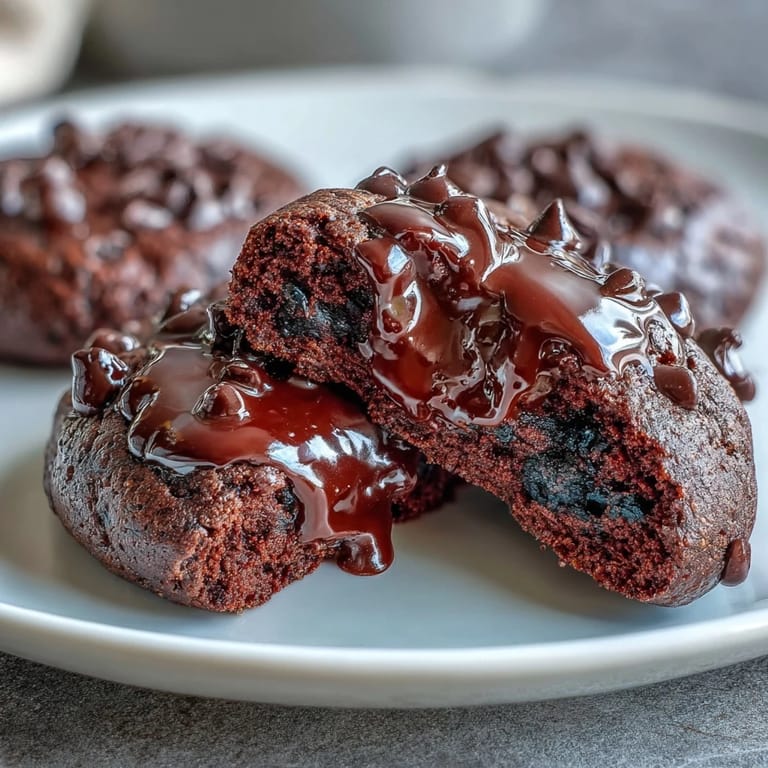
Save I discovered these cookies by accident on a Tuesday morning when I had cottage cheese sitting in my fridge that needed using and a craving for chocolate that wouldn't quit. The idea of blending it into cookie dough felt a bit wild, but the result was unexpectedly fudgy and so protein-packed that I stopped feeling guilty about eating three in a row. Now they're my go-to when I want something that tastes indulgent but actually fuels my body instead of draining it.
My friend Sarah was skeptical when I brought these to her gym session—she thought cottage cheese in cookies sounded like a health trend taken too far. But after one bite, she demanded the recipe and ended up making them for her kids' lunch boxes because they actually stayed full until dinner, and nobody complained about eating vegetables afterward either.
Ingredients
- Oat flour: The base that keeps these cookies tender and chewy rather than crumbly; toasting your own oats and grinding them gives you even more control over texture.
- Unsweetened cocoa powder: Use good-quality powder here since it's doing all the chocolate flavor work—cheap cocoa can taste dusty and bitter.
- Chocolate or vanilla protein powder: This is what makes them actually protein-rich; chocolate obviously matches the vibe, but vanilla lets the cocoa shine if you prefer.
- Baking soda: Just a small amount helps them rise slightly and get those crispy edges you want contrasting the soft center.
- Salt: A pinch makes the chocolate flavor pop and keeps them from tasting one-dimensional.
- Low-fat cottage cheese: Blended smooth, it adds moisture and protein without making the dough grainy; don't skip the blending step or you'll get an unpleasant texture.
- Maple syrup or honey: Both work beautifully; maple adds a subtle earthiness while honey is more straightforward sweet.
- Egg: Binds everything and helps them hold together, plus contributes protein.
- Vanilla extract: Just a teaspoon rounds out the chocolate notes without announcing itself.
- Melted coconut oil or unsalted butter: Choose coconut oil if you want a slight hint of coconut flavor, or butter if you want pure richness.
- Dark chocolate chips: Fold these in carefully so they distribute evenly throughout the dough and give you pockets of chocolate in every bite.
- Mini chocolate chips for topping: Optional but worth it because they melt slightly and create a beautiful chocolate crust.
Tired of Takeout? 🥡
Get 10 meals you can make faster than delivery arrives. Seriously.
One email. No spam. Unsubscribe anytime.
Instructions
- Warm your oven and prepare:
- Set the oven to 350°F and line your baking sheet with parchment paper so nothing sticks and cleanup becomes laughably easy. I learned this the hard way after scrubbing burnt cookie bits off a baking sheet at midnight.
- Mix the dry ingredients:
- Whisk together oat flour, cocoa powder, protein powder, baking soda, and salt in a medium bowl until everything is evenly distributed and you don't see any streaks of cocoa powder. This takes maybe a minute and makes a huge difference in how the cookies bake.
- Blend the cottage cheese until silky:
- Use a blender or food processor to break down the cottage cheese completely—this is non-negotiable because lumps will ruin the texture and create weird pockets in your cookies. It takes about 30 seconds and transforms grainy curds into something smooth and cake-like.
- Combine wet ingredients:
- Add maple syrup, egg, vanilla extract, and melted coconut oil to the blended cottage cheese and pulse or blend briefly just until combined. You're not making a smoothie here; stop as soon as everything looks uniform.
- Bring it all together:
- Pour the wet mixture into the dry ingredients and stir gently with a spatula until just combined, being careful not to overmix. A few small dry streaks are totally fine and actually keep the cookies more tender.
- Fold in the chocolate:
- Add the dark chocolate chips and fold them in carefully so they distribute throughout without breaking apart. If you want extra chocolate coverage, have those mini chips ready.
- Scoop and top:
- Use a cookie scoop or tablespoon to drop heaping portions onto your parchment paper about 2 inches apart, then press a few extra chocolate chips on top of each one if you're feeling fancy. The spacing matters because they'll puff up slightly as they bake.
- Bake until just set:
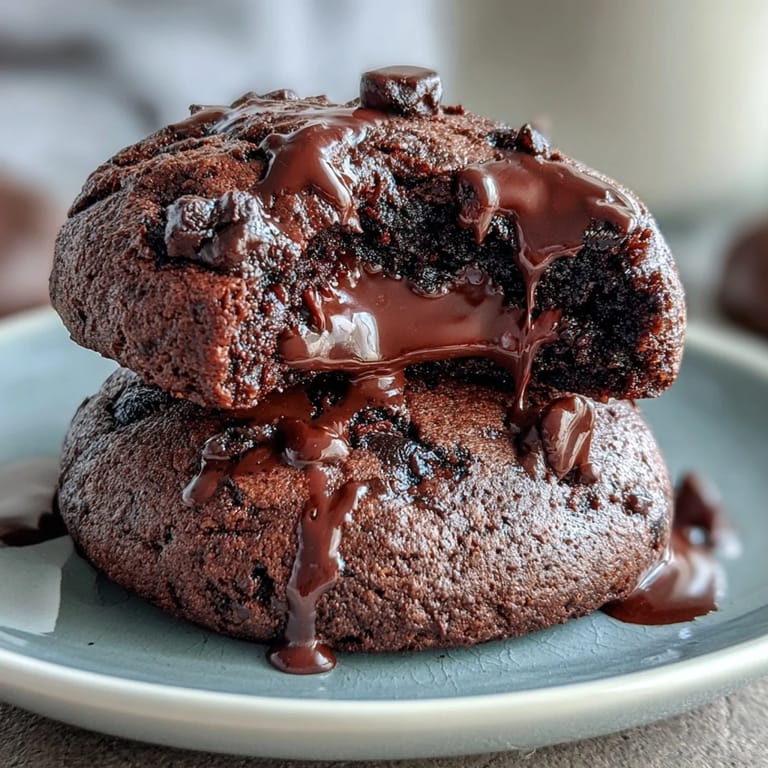
- Bake for 10 to 12 minutes until the edges look firm but the centers still jiggle slightly when you shake the pan—they'll continue cooking on the hot pan as they cool. This is the secret to getting that fudgy center everyone loves.
- Cool properly:
- Let them sit on the baking sheet for 5 minutes so they firm up just enough to move without falling apart, then transfer to a wire rack to cool completely. Patience here matters because warm cookies are delicious but fragile.
 Save
Save One afternoon when my energy crashed hard at 3 PM, I grabbed one of these cookies with coffee and felt genuinely satisfied for hours afterward—not the jittery caffeine rush followed by a crash, just steady energy and genuine contentment. That moment made me realize these weren't just a snack; they were actually part of taking care of myself.
Storage and Staying Fresh
These cookies actually taste better the next day after flavors have melded together, so bake a batch on Sunday and enjoy them all week without guilt. Keep them in an airtight container in the refrigerator where the cool temperature keeps them fudgy and prevents the coconut oil from softening them into mushiness.
Customization Ideas That Actually Work
If you want to experiment without ruining a batch, try swapping the oat flour for almond flour for a nuttier, denser cookie, or use sugar-free chocolate chips and a sugar substitute if you're watching your sugar intake. You can also add a teaspoon of instant espresso powder to deepen the chocolate flavor, or a pinch of cayenne pepper if you want something with an interesting edge.
Making Them Work for Your Life
These cookies are genuinely convenient for busy mornings when you want protein but don't have time to cook, and they travel well in lunch boxes without crumbling everywhere the way some homemade cookies do. I've also brought them to potlucks and watched people light up when they realize something this delicious isn't full of processed ingredients.
- For gluten-free baking, make sure your oat flour and protein powder both say certified gluten-free on the label because cross-contamination is real.
- If your cottage cheese is very wet, you can drain it in a fine-mesh strainer for a few minutes before blending to avoid overly moist dough.
- These freeze beautifully for up to three months, so you can bake a double batch and save half for desperate moments.
 Save
Save These cookies proved to me that healthy eating doesn't have to taste like punishment, and that sometimes the best discoveries come from refusing to waste an ingredient you have lying around. They've become my reliable choice whenever I want something that feels like a treat but actually treats my body well.
Recipe FAQs
- → What ingredients provide protein in these cookies?
Protein comes primarily from cottage cheese and protein powder incorporated into the dough for extra nutritional value.
- → Can I substitute oat flour with another flour?
Yes, almond flour can be used as a substitute to alter the texture and add a nutty flavor.
- → How long should I bake the cookies for best texture?
Bake them for 10 to 12 minutes until edges are set and centers remain slightly soft for a fudgy consistency.
- → Are these cookies suitable for a gluten-free diet?
Yes, using certified gluten-free oat flour and protein powder makes this batch gluten-free.
- → How can I store the cookies to keep them fresh?
Store in an airtight container in the refrigerator for up to 5 days to maintain freshness and texture.