 Save
Save My first encounter with pelmeni was in a cramped Moscow kitchen on a freezing January evening, watching my neighbor's hands move with practiced speed as she folded each tiny dumpling with the precision of someone who'd made thousands. The steam rising from the pot, the smell of beef and onion mingling with melted butter—it felt like stepping into a memory that wasn't quite mine. I tried to keep up, fumbling with my circles of dough while she laughed, not unkindly, and showed me how the corners needed just one quick pinch to hold everything together. That night taught me that pelmeni aren't fancy; they're honest food, the kind that warms you from the inside out.
I made these for my partner on a Tuesday night when we both felt the weight of winter, and watching their face when they bit into the first one—that moment when the filling releases its warmth and the meat is perfectly seasoned—felt like the whole effort had been worth it. Suddenly we weren't just eating dinner; we were sitting at that Moscow kitchen table too, sharing something that stretched across years and continents. That's what pelmeni do: they turn an ordinary weeknight into something that feels rooted in something bigger than yourself.
Ingredients
- All-purpose flour (2 cups): The foundation of your dough—it needs to be strong enough to hold the filling but tender enough to bite through without resistance, so don't use high-protein bread flour here.
- Cold water (1/2 cup): Temperature matters more than you'd think; cold water makes the dough less sticky and easier to work with, giving you those delicate, thin wrappers.
- Large egg (1): Binds everything together and adds richness to the dough that makes it silky when you knead it.
- Salt (1/2 tsp for dough, 1/2 tsp for filling): Never skip salting both components—it seasons the dough from within and brings out the depth in the meat.
- Ground pork and beef (7 oz each): Using both meats creates complexity that pork or beef alone can't achieve; the combination is traditional for a reason.
- Small onion, grated (1): Grating releases the onion's juices, which keeps the filling moist and prevents that dry, dense texture you get from chopped onion.
- Garlic, minced (2 cloves): Just enough to whisper rather than shout—too much and it drowns out the meat's subtle flavor.
- Black pepper (1/2 tsp): Freshly ground makes a difference; pre-ground pepper has lost its brightness by the time it reaches your spice rack.
- Cold water for filling (2 tbsp): This small amount keeps the filling sticky and helps it bind during cooking, so the texture stays tender inside the dumpling.
- Sour cream (1 cup): The crowning touch—full-fat sour cream coats your tongue better than the low-fat versions, and it's worth the splurge.
- Fresh dill, chopped (1 tbsp, optional): Not optional in my kitchen; the brightness cuts through the richness and feels distinctly Russian.
Tired of Takeout? 🥡
Get 10 meals you can make faster than delivery arrives. Seriously.
One email. No spam. Unsubscribe anytime.
Instructions
- Build your dough foundation:
- Combine flour and salt in a large bowl, then add the egg and begin mixing in the cold water a little at a time, using your fingers to bring it together. Knead for 8–10 minutes until the dough becomes smooth and elastic, with no dry bits hiding in the corners—your hands should feel like they're polishing the surface. Cover it tightly with plastic wrap and let it rest for 20 minutes; this resting period relaxes the gluten so the dough becomes easier to roll thin without tearing.
- Mix the filling until it speaks:
- Combine the ground pork, beef, grated onion, minced garlic, salt, pepper, and cold water in a bowl, then stir and fold it over itself until the mixture becomes visibly sticky and pale, about 2–3 minutes of mixing. You'll feel the transformation under your spoon—it should look almost paste-like, which means the proteins are binding and the filling will stay moist during cooking.
- Roll thin and cut with intention:
- Dust your work surface lightly with flour and roll the dough to about 1/16 inch thickness—thin enough to see your hand through it if you hold it up to the light. Use a 2.5-inch round cutter and work quickly so the dough doesn't dry out; if it starts to feel stiff, cover the scraps with a damp towel.
- Fill and fold with the classic shape:
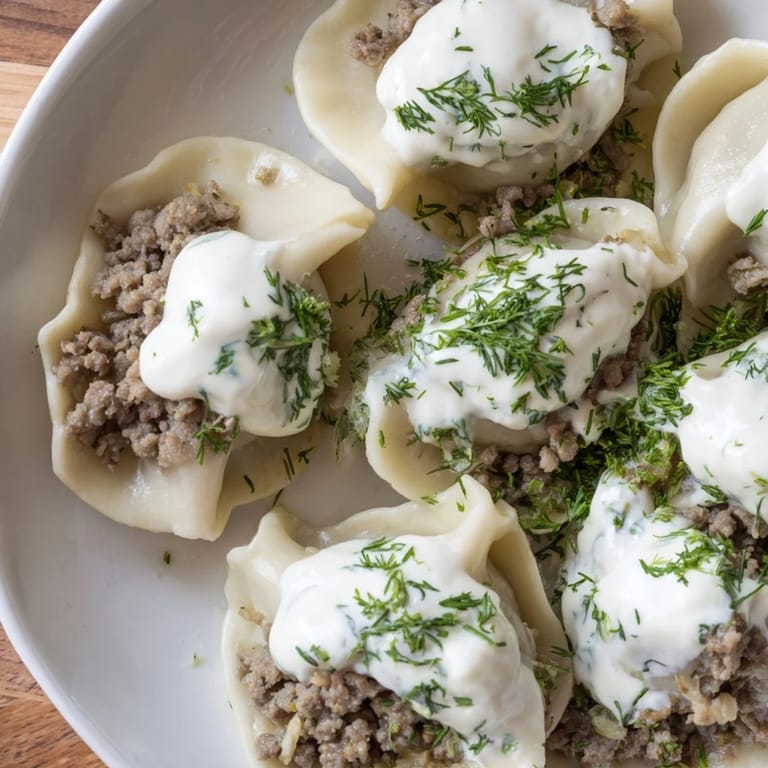
- Place 1 teaspoon of filling slightly off-center on each circle, then fold the dough in half and pinch the curved edge firmly to seal it completely. Bring the two corners of the half-moon together and pinch them tight—this creates the pelmeni's signature shape and keeps the filling from escaping during cooking.
- Bring water to a rolling boil:
- Use a large pot filled with salted water (it should taste like the sea) and bring it to a vigorous boil before adding the pelmeni. The salt flavors them from the outside while they cook and helps them hold their shape.
- Cook until they tell you they're ready:
- Drop the pelmeni in gently, stirring once or twice with a wooden spoon to prevent them from sticking to the bottom. They're done when they float to the surface and you've given them 2–3 more minutes to ensure the filling is cooked through; the dough will taste slightly firm but tender, never mushy.
- Finish with the sauce:
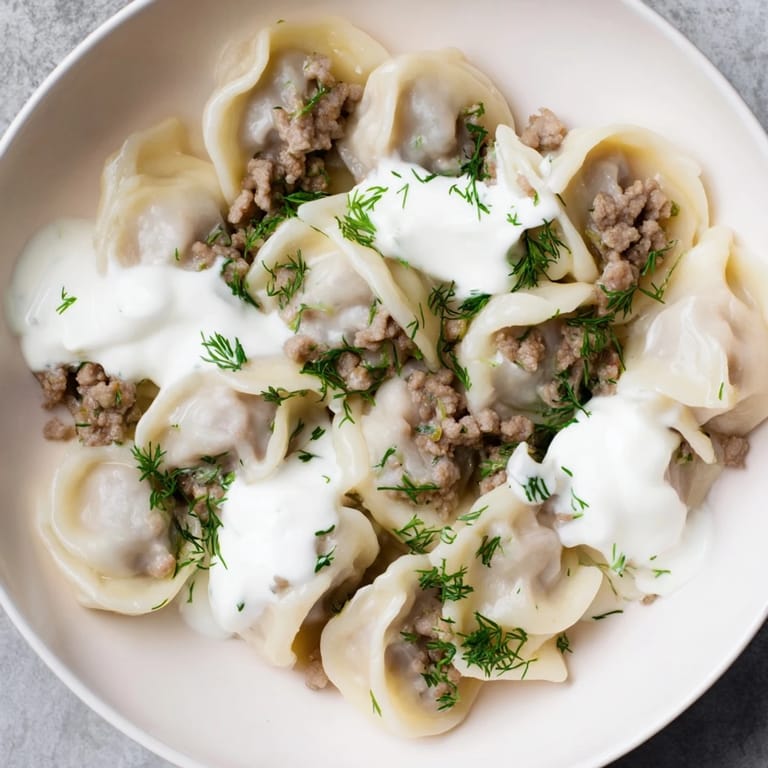
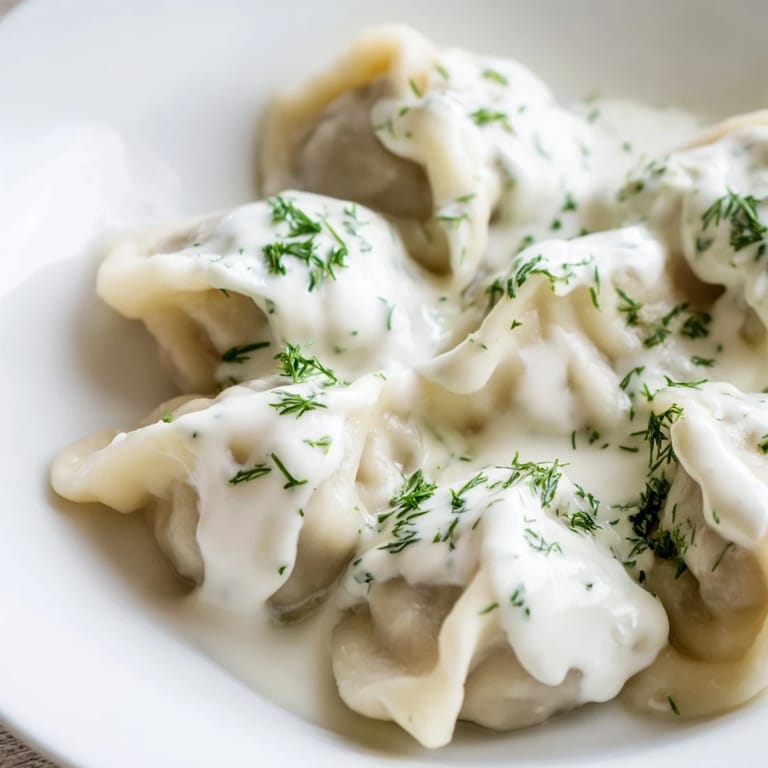
- Lift the cooked pelmeni from the water with a slotted spoon and transfer them directly to a serving bowl. Top generously with sour cream and fresh dill while they're still steaming, so the heat slightly warms the cream and brings out its tanginess.
 Save
Save There's a quiet satisfaction in making pelmeni from scratch that lingers longer than the meal itself—something about folding dozens of little dumplings, knowing exactly what's inside each one, that turns you into someone competent in the kitchen. My hands remember the motion now, muscle memory from a night that started as curiosity and became something like tradition.
The Art of the Perfect Fold
The shape matters more than aesthetics; it's functional. When you bring those corners together, you're creating a seal that keeps the filling secure and helps the dumpling cook evenly. I've seen pelmeni that looked nothing like pelmeni—more like crumpled wads of dough—yet still tasted incredible, so don't get too precious about the shape. What matters is that the seal is tight enough that filling doesn't escape into the water. Watch a video if you need to, but trust your hands; they learn faster than your mind does.
Why the Meat Combination Works
Beef brings structure and depth, while pork adds richness and keeps the filling tender. On its own, beef can taste too lean and sharp; pork alone risks being soft and forgettable. Together, they create something greater than either one alone. The grated onion dissolves into the filling during cooking, which means you get its flavor without biting into chunks—a small detail that separates good pelmeni from the kind that makes you say yes to seconds.
Serving and Storage Wisdom
Pelmeni are best served immediately, while the dough still has warmth and the sour cream is starting to melt into the filling. If you want to make them ahead, freeze the raw dumplings uncooked on a parchment-lined tray, then transfer them to a container once they're solid—they'll keep for three months and cook from frozen in about the same time as fresh.
- Try serving with melted butter and vinegar on the side for a traditional Russian touch that adds complexity.
- Leftover cooked pelmeni can be pan-fried the next day until the bottoms crisp up—a texture contrast you won't expect but will absolutely want again.
- Make double batches and freeze them; having homemade pelmeni in your freezer is like having comfort on standby.
 Save
Save Pelmeni remind you that some of the best meals come from simple ingredients treated with attention and care. Make these and feed someone you care about.
Recipe FAQs
- → What dough texture is ideal for pelmeni?
The dough should be smooth and elastic after kneading, resting for 20 minutes helps achieve easy rolling and shaping.
- → How do you ensure the filling stays juicy?
Mixing ground pork and beef with grated onion, garlic, and a bit of cold water helps keep the filling moist and flavorful.
- → What is the best way to shape pelmeni?
Cut dough into circles, place a teaspoon of filling inside, fold in half, pinch edges tightly, then bring corners together to seal.
- → How do you know when pelmeni are cooked?
They float to the surface after about 5–7 minutes of boiling, indicating they are cooked through.
- → What toppings complement pelmeni well?
Rich sour cream sauce with fresh dill adds a creamy, herbaceous finish, while vinegar or melted butter offer traditional flavor options.