 Save
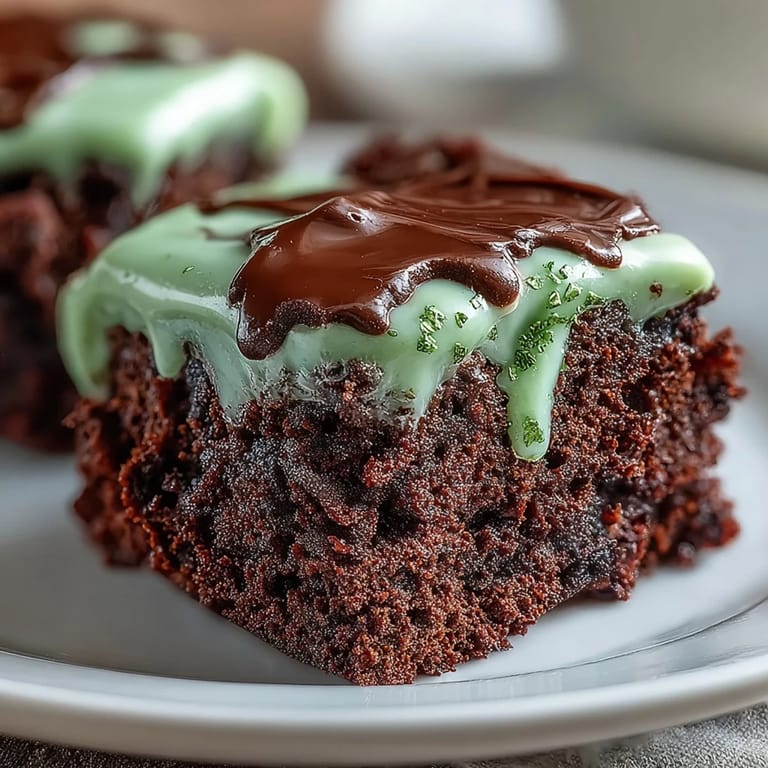
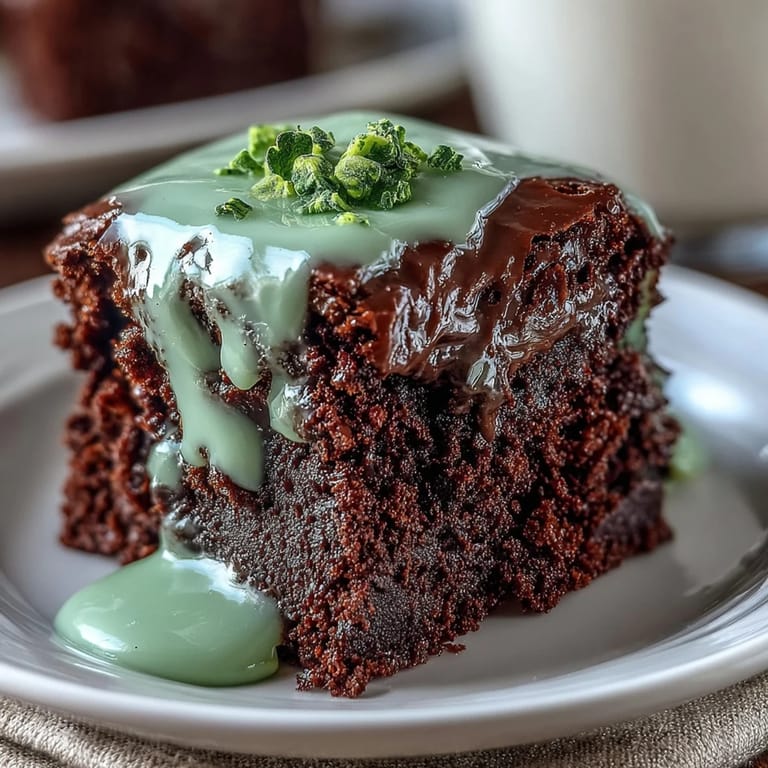
Save My neighbor showed up at my door three days before St. Patrick's Day holding a shamrock-shaped cookie cutter she'd found at a thrift store, insisting we had to do something with it. I laughed and promised her these brownies—fudgy, rich chocolate squares transformed into tiny emerald-topped shamrocks that somehow made the whole holiday feel less about pinching people and more about gathering around something genuinely delicious. There's something about cutting brownies into a recognizable shape that makes them feel celebratory rather than ordinary, like you've turned a simple dessert into a small act of festivity.
I made these for my daughter's class party, and watching a room full of seven-year-olds recognize the shamrock shape before realizing it was chocolate was pure joy. One kid asked if they tasted like luck, and honestly, after seeing their faces light up, I felt pretty lucky myself.
Ingredients
- Unsalted butter (1/2 cup): Melt it slowly over low heat so it doesn't brown—you want a clean flavor base for the chocolate to shine.
- Granulated sugar (1 cup): This is what gives brownies that slight crispy edge while keeping the center soft, so don't skip it.
- Large eggs (2): They bind everything together and add moisture, so use room temperature eggs if you can.
- Vanilla extract (1 teaspoon): Just a teaspoon deepens the chocolate flavor without making it taste like vanilla.
- Unsweetened cocoa powder (1/3 cup): Buy the good stuff if possible—it's the star ingredient and worth the extra dollar or two.
- All-purpose flour (1/2 cup): Measure it by spooning into the cup and leveling off, not scooping directly, or you'll end up with tough brownies.
- Salt (1/4 teaspoon): This tiny amount makes the chocolate taste deeper and more complex.
- Baking powder (1/4 teaspoon): Just enough to give the brownies a slight lift without making them cakey.
- Powdered sugar (1 1/2 cups for icing): Sift it first to avoid lumps in your icing, or beat it longer if you don't have a sifter.
- Softened butter for icing (2 tablespoons): Let it sit on the counter for twenty minutes—cold butter won't mix smoothly.
- Milk (2 tablespoons): This creates a spreadable consistency, though you can use cream for a richer icing.
- Green food coloring: Start with just two or three drops and build up the color gradually so you don't end up with neon shamrocks.
- Green sprinkles or sanding sugar (optional): These add a festive touch and a tiny bit of crunch if you want them.
Tired of Takeout? 🥡
Get 10 meals you can make faster than delivery arrives. Seriously.
One email. No spam. Unsubscribe anytime.
Instructions
- Set yourself up for success:
- Preheat your oven to 350°F and line your 8x8-inch pan with parchment paper, letting the edges hang over so you can lift the whole thing out later. This small step saves you from the frustration of trying to wrestle warm brownies out of a tight pan.
- Melt and mix the base:
- In a medium saucepan, melt the butter over low heat, then remove from the heat and stir in the sugar, eggs, and vanilla until everything looks smooth and glossy. You're building a silky foundation here, so take thirty seconds to really mix it.
- Fold in the dry ingredients gently:
- Add the cocoa powder, flour, salt, and baking powder all at once and mix just until you don't see any streaks of white flour anymore. This is where people mess up by overmixing—stop as soon as everything is combined or you'll have tough, cakey brownies instead of fudgy ones.
- Pour and smooth:
- Spread the batter into your prepared pan and use a spatula to even out the top so the brownies bake consistently. A smooth top also makes them easier to cut into neat shamrocks later.
- Bake with attention:
- Bake for 25 to 30 minutes, checking around the 25-minute mark by inserting a toothpick into the center. You want it to come out with a few moist crumbs still clinging to it—not clean, and definitely not wet, but still slightly underbaked.
- Cool completely before moving forward:
- Let the brownies cool all the way in the pan on a wire rack, which takes about thirty minutes. Trying to cut warm brownies is asking for crumbly disaster.
- Whip up the icing while waiting:
- Beat together the softened butter, powdered sugar, milk, and vanilla in a bowl until it's smooth and spreadable, then add green food coloring drop by drop until you hit your desired shade. A few drops at a time prevents you from accidentally making the icing look like a leprechaun, which may or may not have happened to me once.
- Cut into shamrocks:
- Lift the cooled brownies out using the parchment overhang, then use your shamrock cookie cutter to cut out shapes, wiping the cutter clean between cuts so you get neat edges. Have a small bowl of water nearby and dip your cutter slightly between cuts if it starts sticking.
- Frost and decorate:
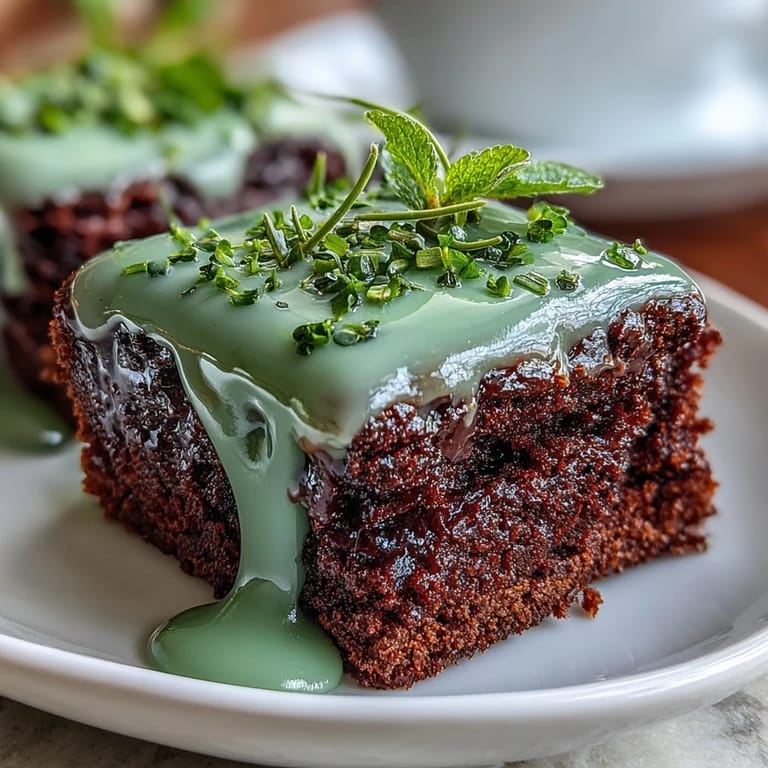
- Spread a generous amount of green icing onto each shamrock shape, then add sprinkles or sanding sugar if you're using them. The icing should be thick enough to cling to the brownie but soft enough to spread easily.
- Let the icing set:
- Give the icing a few minutes to set before serving, though honestly they're delicious even if it's still slightly soft. If you're making these ahead, let them sit uncovered for an hour before storing in an airtight container.
 Save
Save There's something about handing someone a bright green frosted shamrock brownie that immediately shifts the mood in a room. It transforms a dessert into a small celebration, and suddenly St. Patrick's Day isn't just about wearing green—it's about sharing something you made with your hands.
Getting the Icing Just Right
The icing consistency matters more than most people realize, and I learned this the hard way when my first batch slid right off the brownies. You want it somewhere between buttercream and frosting—thick enough to hold its shape but soft enough to spread without tearing the brownie surface. If your icing is too thick, add milk one teaspoon at a time; if it's too thin, add a bit more powdered sugar and beat again. Room temperature butter is absolutely essential here because cold butter creates lumps that no amount of beating will fix.
Making Them Ahead Works Beautifully
You can bake these brownies two days before your St. Patrick's Day gathering and store them unfrosted in an airtight container, then frost them a few hours before serving. This approach takes pressure off your party day and actually means the brownies taste even better because they've had time for the chocolate flavor to deepen. I've learned that planning ahead for dessert is one of the kindest things you can do for yourself on a busy day.
Customizing Your Shamrocks
While the classic version with just green icing and sprinkles is absolutely perfect, these brownies also love a few gentle tweaks if you want to experiment. You could stir mini chocolate chips or chopped pistachios into the brownie batter for extra texture, drizzle white icing over the green to create a marbled effect, or even dust the frosting with edible gold glitter for a pot-of-gold moment. The beauty of this recipe is that the brownie base is sturdy enough to support whatever festive direction your kitchen creativity wants to take.
- Crushed candy canes make an unexpected but delicious addition if you're stretching these into December holidays.
- A tiny dab of gold edible glitter on top transforms them into something that feels extra-special without much extra effort.
- Keep extra frosting nearby in case anyone wants a second shamrock—you never know when people will get attached to this idea.
 Save
Save These shamrock brownies have become my favorite way to mark the day—not because they're complicated, but because they're simple enough that anyone can make them yet special enough that people remember them. There's something deeply satisfying about turning ordinary brownies into something festive with just a cutter and some green frosting.
Recipe FAQs
- → What is the best way to shape the brownies?
Use a metal shamrock-shaped cookie cutter for clean edges and easy cutting. Wiping the cutter between shapes prevents sticking.
- → How can I achieve the perfect brownie texture?
Avoid overmixing the batter; mix just until combined to maintain a fudgy, moist consistency after baking.
- → Can I adjust the green icing color naturally?
Yes, add green food coloring gradually until reaching the desired shade or try naturally colored powders like matcha for a subtle hue.
- → How long should I bake the brownies?
Bake at 350°F for 25-30 minutes. Check with a toothpick; it should come out with moist crumbs but not wet batter.
- → What are good decoration options besides sprinkles?
Consider sanding sugar, finely chopped pistachios, or a dusting of cocoa powder for added texture and visual appeal.