 Save
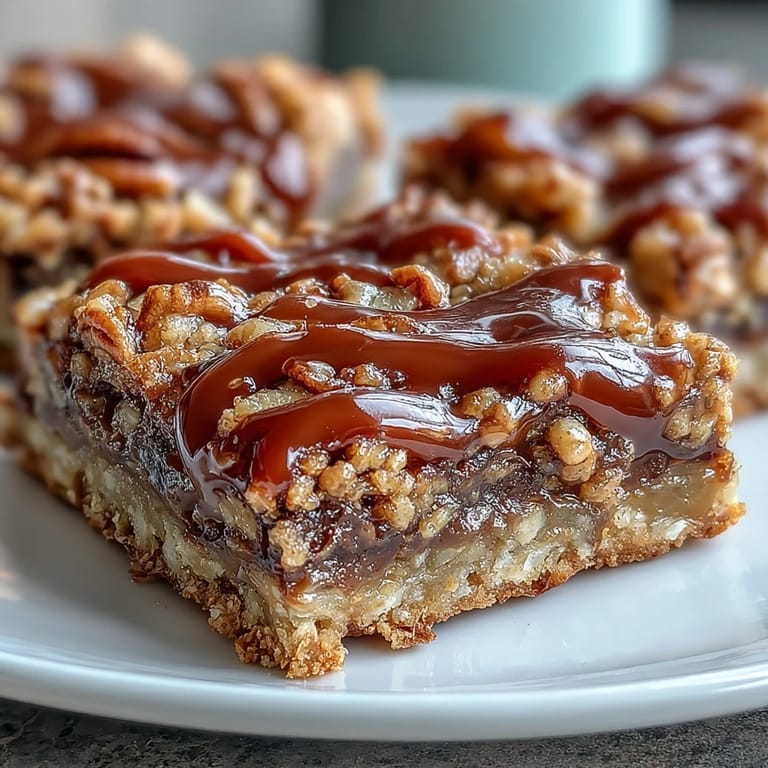
Save The smell hit me before I even opened the oven door: warm butter, toasted oats, and caramel melting into every corner of the pan. I was testing this recipe on a rainy afternoon when my kitchen counters were cluttered with half-empty bags of chocolate chips and a jar of caramel sauce I'd been meaning to use. What started as a pantry cleanout turned into something I now bake every time I need to bring dessert somewhere important. These bars don't just taste good, they hold their shape, travel well, and disappear faster than anything else I've ever made.
I brought a pan of these to a potluck once, still warm and barely set, because I ran out of time. People ate them with forks straight from the dish, and someone asked if I'd trained at a bakery. I hadn't, but I did learn that letting them cool completely is the only way to get clean cuts. Now I bake them the night before and hide a few in the back of the fridge for myself.
Ingredients
- All purpose flour: This binds the crumb base without making it cakey, and I've learned that measuring it lightly (not packed) keeps the bars tender.
- Rolled oats: Use old fashioned oats, not instant, because they hold their shape and give you that chewy bite in every layer.
- Brown sugar: The molasses adds moisture and a deep sweetness that balances the caramel.
- Granulated sugar: A little white sugar keeps the crumb from getting too sticky and helps it crisp up on top.
- Unsalted butter, melted: Melted butter makes the dough come together without creaming, and you can control the salt level yourself.
- Salt: Just a pinch wakes up the sweetness and makes the caramel taste more complex.
- Baking soda: A small amount gives the crust a slight lift and keeps it from feeling dense.
- Semi sweet chocolate chips: I prefer semi sweet over milk chocolate here because the caramel is already very sweet.
- Chopped pecans: Toast them lightly before adding if you want a deeper nutty flavor, but raw works fine too.
- Caramel sauce: Store bought is fast and reliable, but if you have homemade on hand, it makes the bars taste even more luxurious.
- Heavy cream: This loosens the caramel so it pours smoothly and soaks into the layers without hardening too fast.
Tired of Takeout? 🥡
Get 10 meals you can make faster than delivery arrives. Seriously.
One email. No spam. Unsubscribe anytime.
Instructions
- Prep the pan:
- Preheat your oven to 350°F and grease a 9x9 inch pan generously, or line it with parchment paper leaving some overhang for easy lifting later. This step saves you from scraping stuck edges.
- Mix the crumb base:
- Combine flour, oats, both sugars, melted butter, salt, and baking soda in a large bowl, stirring until the mixture looks like wet sand with small clumps. It should hold together when pressed but still feel crumbly.
- Form the crust:
- Set aside 1 cup of the crumb mixture in a small bowl, then press the rest firmly into the bottom of your prepared pan. Use the bottom of a measuring cup to flatten it evenly.
- Bake the crust:
- Bake for 10 minutes until it just starts to turn golden at the edges. This pre bake keeps the bottom from getting soggy once you add the wet layers.
- Warm the caramel:
- While the crust bakes, heat caramel sauce and heavy cream in a small saucepan over medium low heat, stirring constantly until smooth and pourable. Remove from heat as soon as it's combined.
- Layer the fillings:
- Pull the crust from the oven and immediately sprinkle chocolate chips evenly over the hot surface, then scatter pecans on top. The warmth will start melting the chocolate slightly.
- Pour the caramel:
- Drizzle the warm caramel mixture slowly over the chocolate and pecans, letting it pool and settle into every gap. Work quickly before it starts to set.
- Add the crumb topping:
- Sprinkle the reserved crumb mixture evenly over the caramel layer, pressing gently so it sticks but doesn't sink. This top layer will bake into a golden, crunchy lid.
- Finish baking:
- Return the pan to the oven and bake for 15 to 20 minutes, until the topping is deeply golden brown. Watch the edges to avoid burning.
- Cool completely:
- Let the bars cool in the pan on a wire rack for at least 30 minutes, or until fully set. Cutting them warm will make them fall apart.
 Save
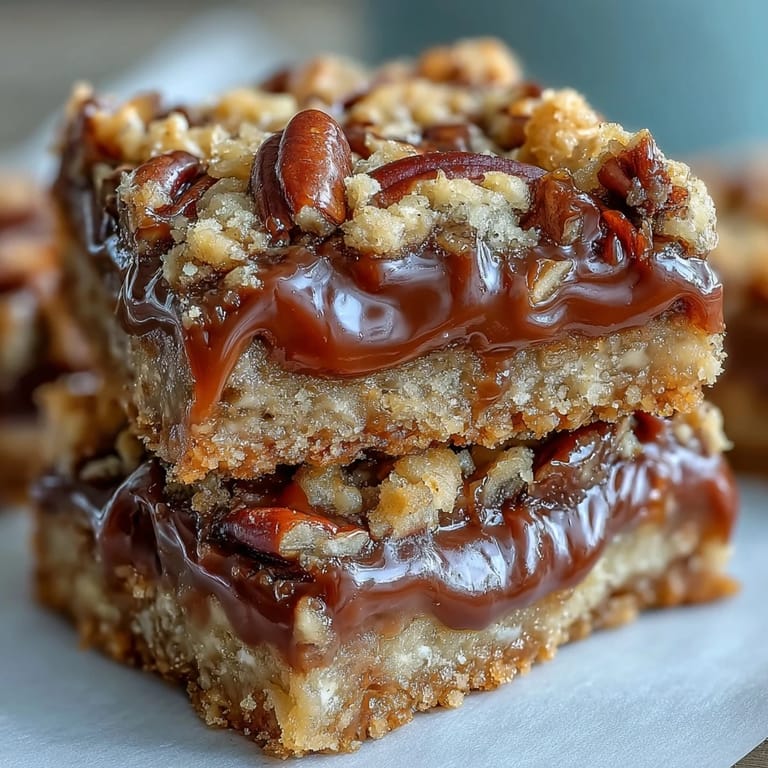
Save One evening I made these for a neighbor who'd just had surgery, and she told me later that her husband ate three in one sitting and hid the rest from her. I've been making double batches ever since, because keeping them around is impossible. They've become my answer to every bake sale, hostess gift, and late night craving.
Storage and Make Ahead Tips
These bars keep beautifully in an airtight container at room temperature for up to a week, though they rarely last that long. I've also frozen them individually wrapped in plastic, and they thaw in about an hour on the counter. If you're planning ahead, bake them the night before and store them in the fridge overnight, they actually slice even cleaner when cold.
Customizing Your Bars
I've swapped pecans for walnuts when that's what I had on hand, and I've used dark chocolate chips when I wanted something less sweet. A pinch of flaky sea salt sprinkled on the caramel layer before adding the crumb topping gives them that salted caramel edge people go crazy for. You can also drizzle melted chocolate over the cooled bars if you want them to look bakery perfect.
Serving Suggestions
I like serving these bars slightly warm with a scoop of vanilla ice cream, or cold straight from the fridge with black coffee. They're rich enough that one square feels like plenty, but I've never seen anyone stop at just one. If you're bringing them somewhere, cut them into smaller pieces so people don't feel guilty taking seconds.
- Serve with a drizzle of extra caramel sauce and a sprinkle of sea salt for a fancy presentation.
- Pair with strong coffee or cold milk to balance the sweetness.
- Wrap individual bars in wax paper for lunchboxes or road trip snacks.
 Save
Save These bars have earned a permanent spot in my recipe rotation, not because they're complicated, but because they deliver every single time. Make them once, and you'll understand why I always keep caramel sauce in my pantry.
Recipe FAQs
- → Can I use homemade caramel sauce instead of store-bought?
Yes, homemade caramel sauce works perfectly in this dessert. Simply combine it with heavy cream as directed in the instructions for a smooth, pourable consistency.
- → How do I prevent the bars from sticking to the pan?
Line your 9x9-inch baking pan with parchment paper, leaving some overhang on the sides. This makes lifting and cutting the bars much easier after they've cooled completely.
- → Can I substitute the pecans with other nuts?
Absolutely. Walnuts or almonds make excellent substitutes for pecans, offering different flavor profiles while maintaining the same texture and crunch.
- → Why do the bars need to cool completely before cutting?
Cooling allows the caramel and chocolate layers to set properly, ensuring clean cuts and preventing the layers from sliding apart when you slice the bars into squares.
- → How should I store leftover turtle bars?
Store the bars in an airtight container at room temperature for up to one week. For longer storage, refrigerate them for up to two weeks or freeze for up to three months.
- → Can I add sea salt for a salted caramel flavor?
Yes, sprinkle a pinch of flaky sea salt over the caramel layer before adding the crumb topping. This creates a delicious sweet and salty contrast.